Hi, Friends!
Spring is approaching, and many of you have been asking again about rooting hibiscus cuttings. So we decided to share our method once more — this time with a few extra details.
Have you ever looked at a beautiful hibiscus and thought:
"I wish I had ten more of these!"
Good news… you actually can!
Rooting hibiscus cuttings is one of the most satisfying ways to multiply your plants. With the right timing, proper conditions, and a little patience, one branch can turn into a whole new plant.
After several years of experimenting with different techniques, we've settled on a simple and reliable method that gives an excellent survival rate. It works great for both hobby growers and serious plant collectors.
So grab your pruning shears — and maybe a cup of tea ☕ — and let's grow some new hibiscus plants!
🌱 BEST TIME TO ROOT HIBISCUS
The best periods for rooting hibiscus cuttings are:
- 🌿 Spring
- 🌿 Beginning of summer
Many gardeners also root cuttings during:
- 🍂 August – September (after autumn pruning)
During these periods the plants are actively growing, which means they naturally produce roots more easily.
You can think of it as the plant being in a "growth mood".
Winter cuttings behave more like sleepy cats 🐈 — slow and not very motivated.
🌿 MATERIALS YOU WILL NEED
Before starting, prepare the following items:
🪴 1. Healthy cutting (about 10 cm) Choose a strong, healthy stem. Young thin stems usually root faster than thick woody ones.
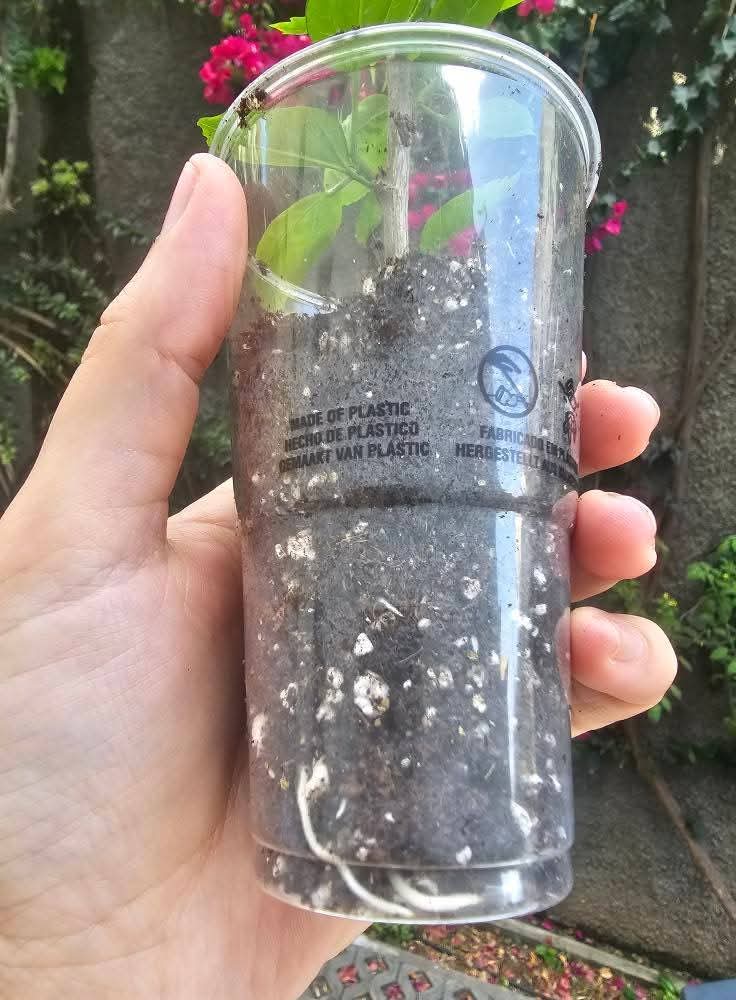
🥤 2. Transparent plastic cups (200 ml) Make drainage holes in the bottom. Transparent cups allow you to easily see when roots start forming.
✂️ 3. Sharp knife or pruning shears Use clean, sharp tools to make a smooth angled cut. Clean cuts reduce the risk of infection.
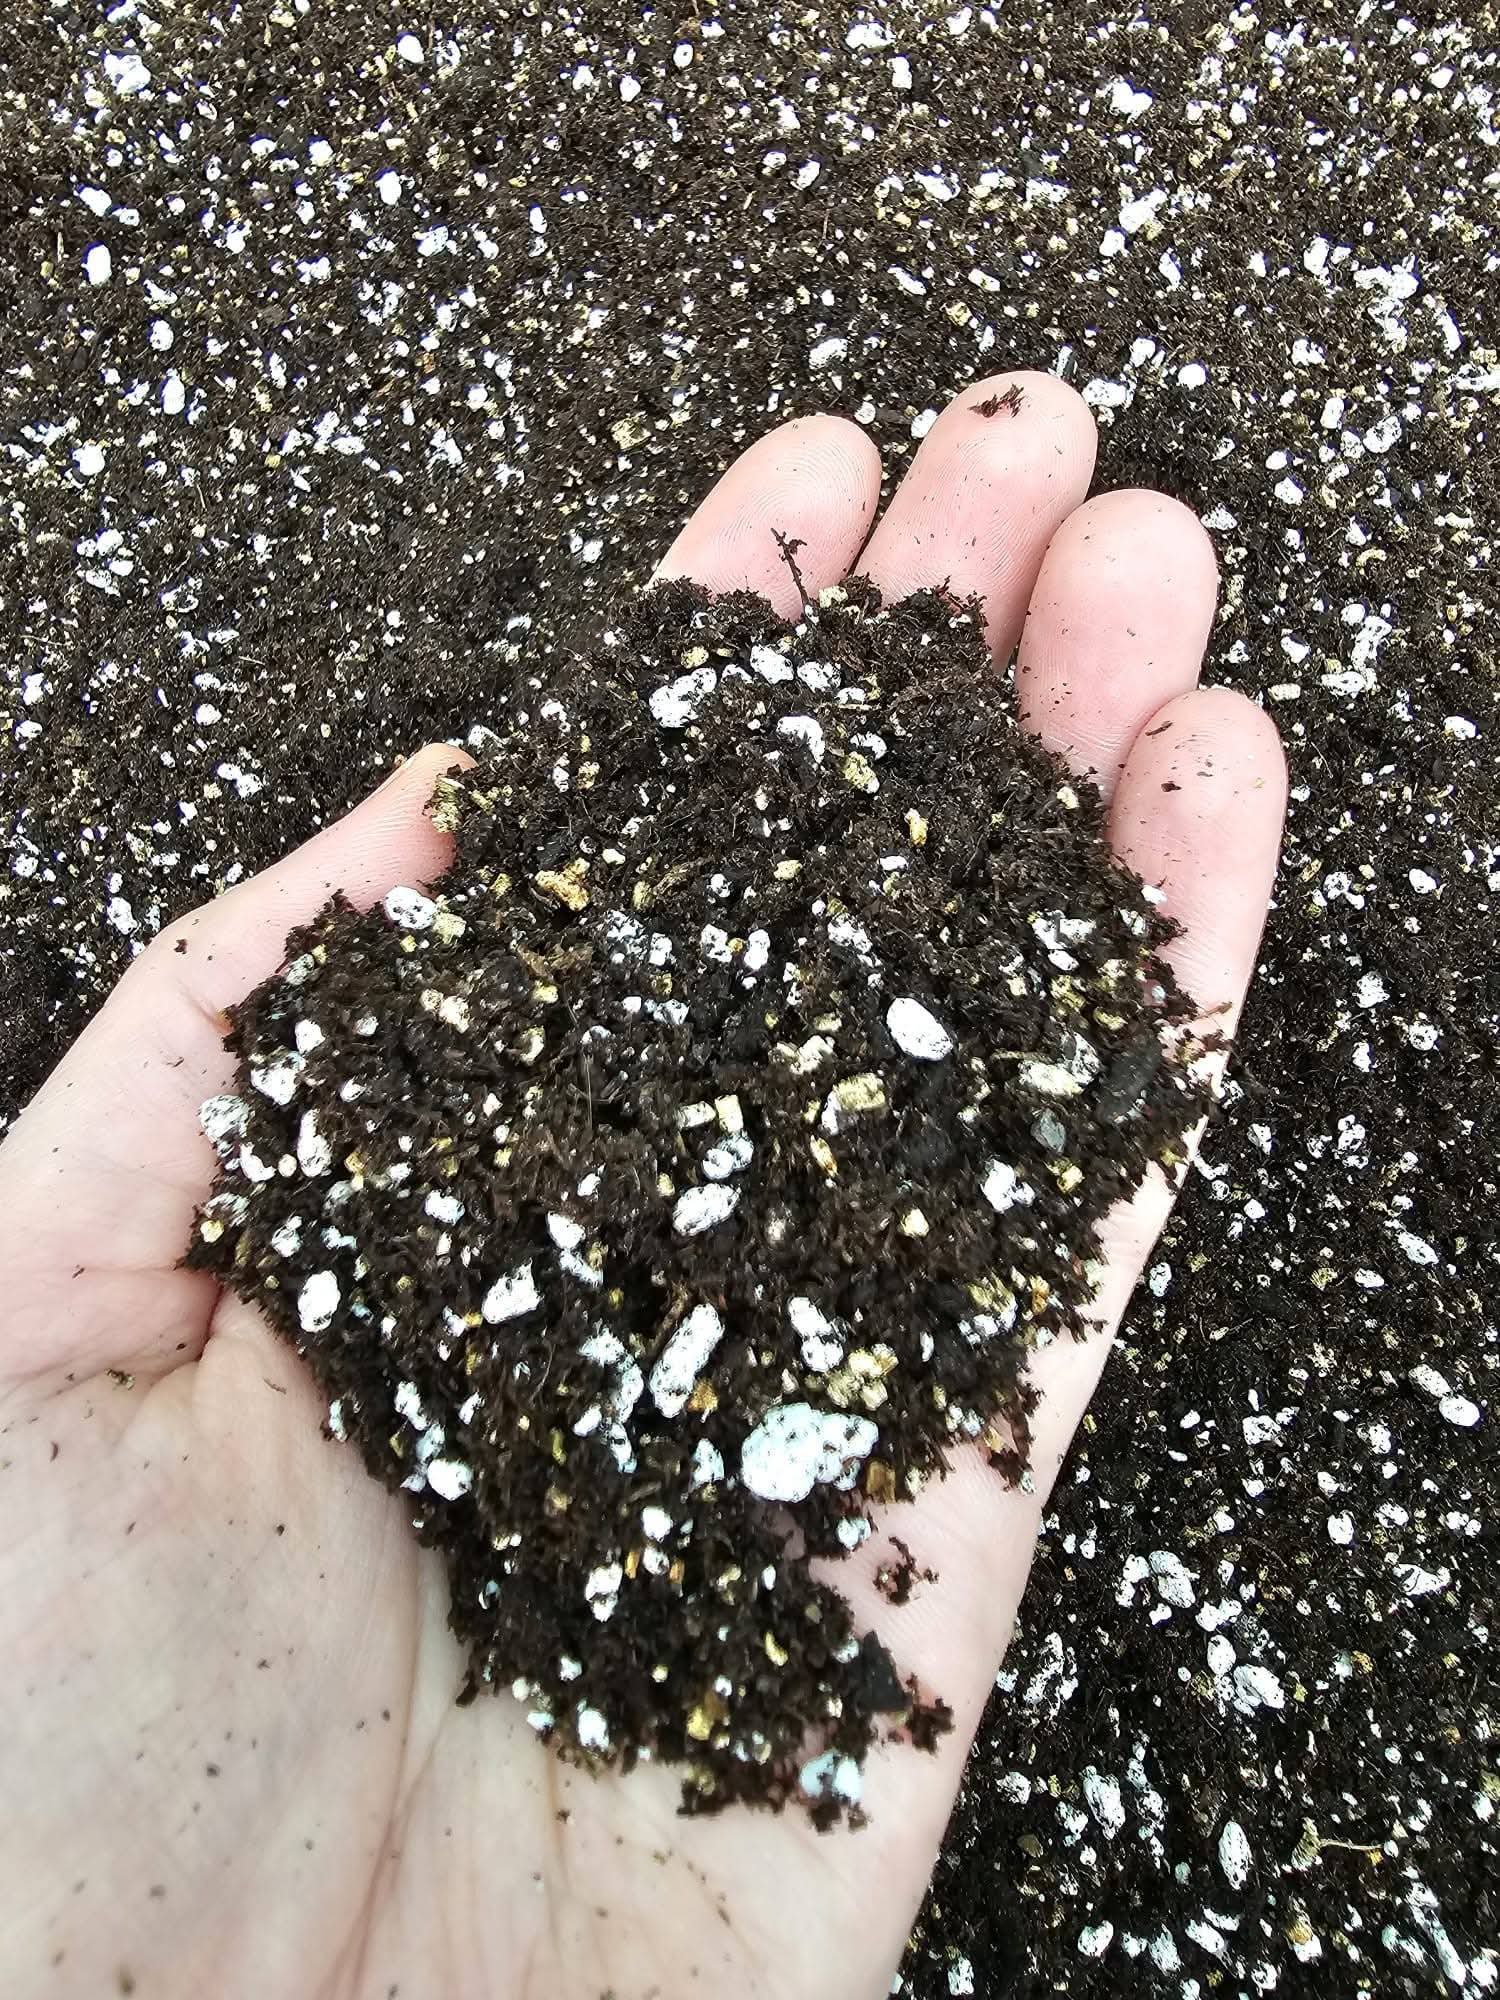
🌱 4. Rooting substrate (soil mix) A light, breathable soil mix designed for rooting.
🧪 5. Rooting hormone This greatly improves success with standard hibiscus varieties. Products like Clonex work very well. Hybrid varieties often root even better in rooting cubes such as Root Riot.
🏡 6. Mini greenhouse You can use:
- a transparent plastic box with a lid (for many cuttings)
- a plastic bag placed over the cups (perfect for 1–5 cuttings)
Provides stable light without the risk of burning the plants.
🌱 STEP-BY-STEP ROOTING PROCESS
STEP 1 — Prepare the substrate
Fill the cups with slightly moist soil. The soil should be: ✔ light ✔ airy ✔ moderately firm
Avoid soil that is compact, heavy, or muddy.
STEP 2 — Prepare the cutting
✂️ Make a clean angled cut at the base of the stem. 🧪 Dip the cut end into rooting hormone. 🌱 Insert the cutting into the soil. 🤲 Gently press the soil around the stem to stabilize it.
STEP 3 — Adjust the leaves
🍃 Remove leaves from the lower part of the stem. 🍃 Leave about 3–4 leaves at the top.
If the leaves are large: ✂️ cut them in half. This helps reduce water loss while the cutting still has no roots.
STEP 4 — Place in the mini greenhouse
Put the planted cups inside the mini greenhouse and place them in a warm, bright location under a lamp.
And now comes the hardest part…
😂 Leave them alone for TWO WEEKS.
Yes, really. 🚫 No watering 🚫 No ventilation 🚫 No checking every five minutes
Plants really dislike helicopter parents.
Rooting success depends mostly on stable environmental conditions.
💧 Soil moisture The substrate should be slightly moist, not wet. Too much water is the fastest way to turn a cutting into compost.
🌿 Healthy cuttings Always choose stems that are free of pests and diseases.
🌡 Ideal conditions
- Temperature: 20–28°C
- Humidity in greenhouse: 90–100%
- Light: bright artificial light
☀️ Avoid direct sunlight. A closed plastic box under strong sun quickly becomes a plant sauna… and hibiscus are not spa enthusiasts.
⏱ ROOTING TIMELINE
First two weeks
After about one week, briefly check the greenhouse for: 🍂 fallen leaves 🍂 yellow leaves
Remove them immediately. In humid conditions they can quickly cause mold.
Leaf drop during rooting is normal, but fallen leaves should always be removed. If your cutting had no leaves to begin with — congratulations, you just skipped this problem.
After two weeks
Now you can begin gentle ventilation.
🌬 Open the greenhouse or plastic bag for about 10–15 minutes every 4–5 days.
Also check the transparent cups. Many cuttings begin forming roots within 2–3 weeks.
🌱 WHAT IF ROOTS DON'T APPEAR?
After 2–3 weeks:
If some cuttings have roots ✔ Everything is normal. Some cuttings simply root faster than others.
If none show roots You may inspect one cutting. Look at the base of the stem.
⚪ A white or light callus has formed. This is root precursor tissue and roots should appear soon.
❌ Problem stage ⚫ The base is black, soft, or not sealed. This means the cutting has started to rot.
But if the upper part still looks healthy, you can try again.
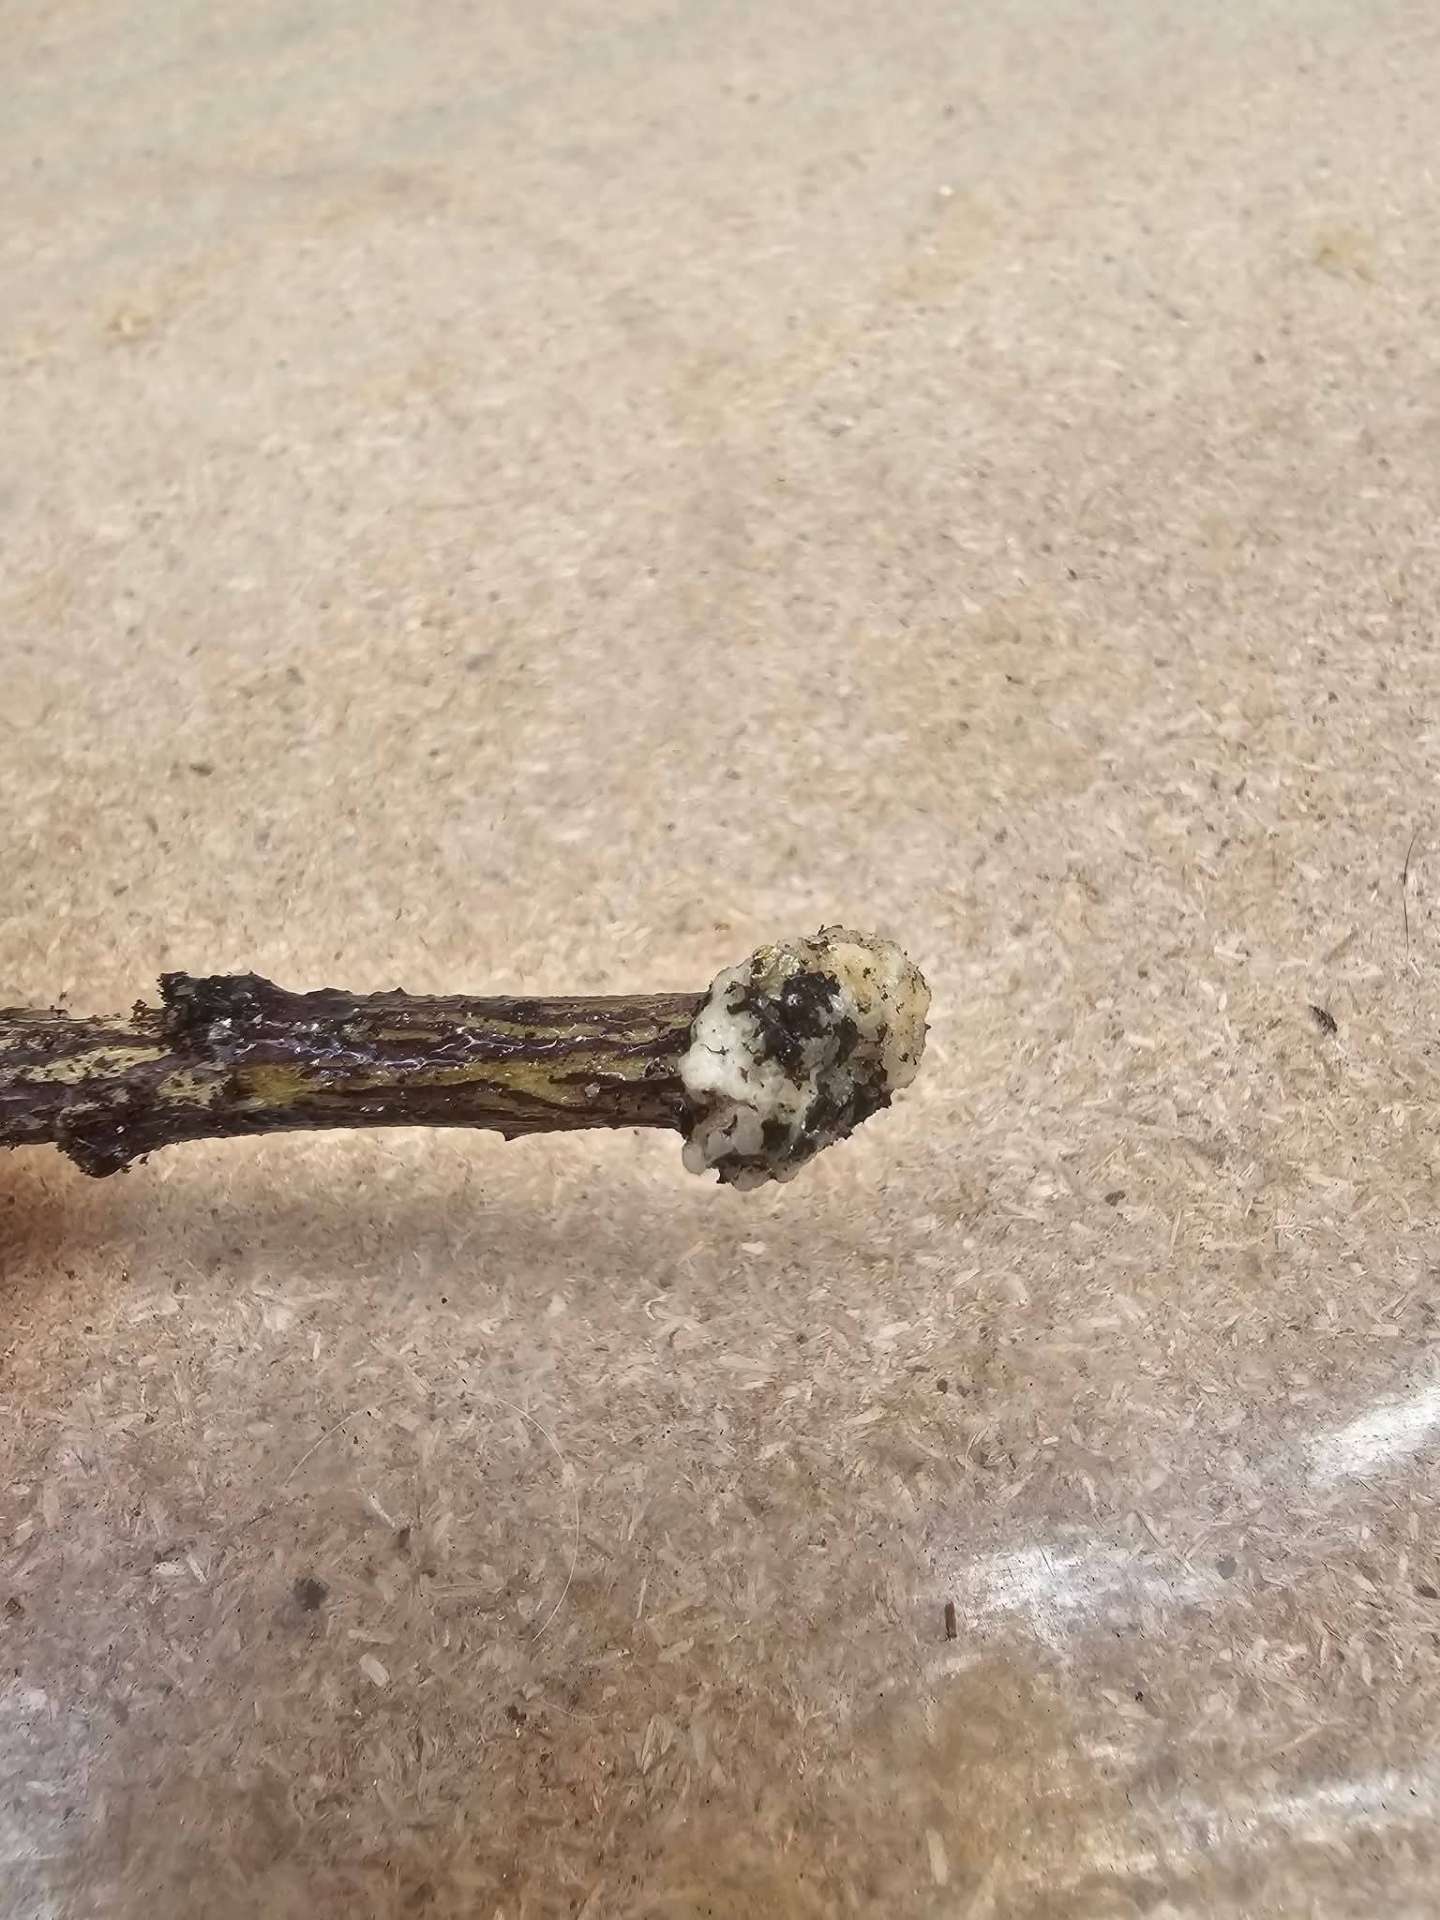
Second chance rooting: ✂️ Cut off the damaged base with sterilized scissors 🧪 Dip the new cut into rooting hormone 🌱 Replant into fresh soil and a new mini greenhouse
Sometimes plants just need a second chance.
💧 WATERING ROOTING CUTTINGS
Once callus forms and the soil begins to dry slightly, you can start watering carefully.
Recommended amount: 💧 20–30 ml per cup or 💦 5–7 sprays with a spray bottle
Frequency: 📅 About once or twice per week.
If the soil is still moist, skip watering and simply mist the leaves.
🦠 COMMON ROOTING PROBLEMS
Mold on soil surface 🪴 Remove the top soil layer. 🧴 Lightly treat the surface with a fungicide spray.
Wilting cuttings Check the base of the stem. Possible causes:
- stem rot
- low humidity
- dry soil
Solutions: ✂️ Rot → recut and re-root 💦 Low humidity → mist lightly and close the greenhouse 💧 Dry soil → water slightly
Plants can be a bit dramatic sometimes. A little troubleshooting usually solves the issue.
⏳ ROOTING TIME
Different hibiscus varieties root at different speeds.
🌿 Regular varieties: 2–8 weeks 🌺 Hybrid varieties: 2–16 weeks
Yes… sixteen weeks can feel like a long time. But gardening teaches patience better than almost anything else 🤭
🌿 ACCLIMATING ROOTED CUTTINGS
Once roots appear, the plant must slowly adapt to normal air conditions.
Start opening the greenhouse for: 🌬 5–10 minutes per day.
If the leaves stay firm, gradually increase the time. If they wilt, place the plant back into the greenhouse until it recovers, then try again.
Most rooted plants adjust to open air within 1–5 days.
🌱 IDEAL ROOTING SOIL MIX
A good rooting substrate should be: ✔ light ✔ airy ✔ well-draining ✔ moisture-permeable
Avoid heavy or soggy soil.
Quick and easy soil mix:
Ingredients: 🪴 Compo Sana flower soil 🌱 Light seedling soil or peat moss ⚪ Perlite / vermiculite
Ratio: 1 : 2 : 1 (Compo Sana : peat/seedling soil : perlite/vermiculite)
This mix works very well for most hobby growers.
Alternative option — no mixing needed
If you want something simpler, you can root cuttings in: 🌱 Root Riot propagation cubes (highly recommended) 🥥 Coconut fiber plugs 🌿 Peat moss or seed starting mix 🥥 Coconut coir ⚪ Perlite or vermiculite
🌺 FINAL THOUGHTS
Rooting hibiscus cuttings is a mix of science, patience, and a little gardening magic.
With the right conditions: 🌡 warm temperatures 💧 high humidity 🌱 light substrate
Most healthy cuttings will produce roots successfully.
And when you finally see those tiny white roots through the cup… it really feels like magic 🧚♀️
After all, you just turned a small branch into a whole new plant.
We wish you great success with your rooting experiments. Creating plants from cuttings is one of the most rewarding parts of gardening.
🌺 Good luck 🌱 Happy growing ❤️ And may your greenhouse always be full of tiny future hibiscus.